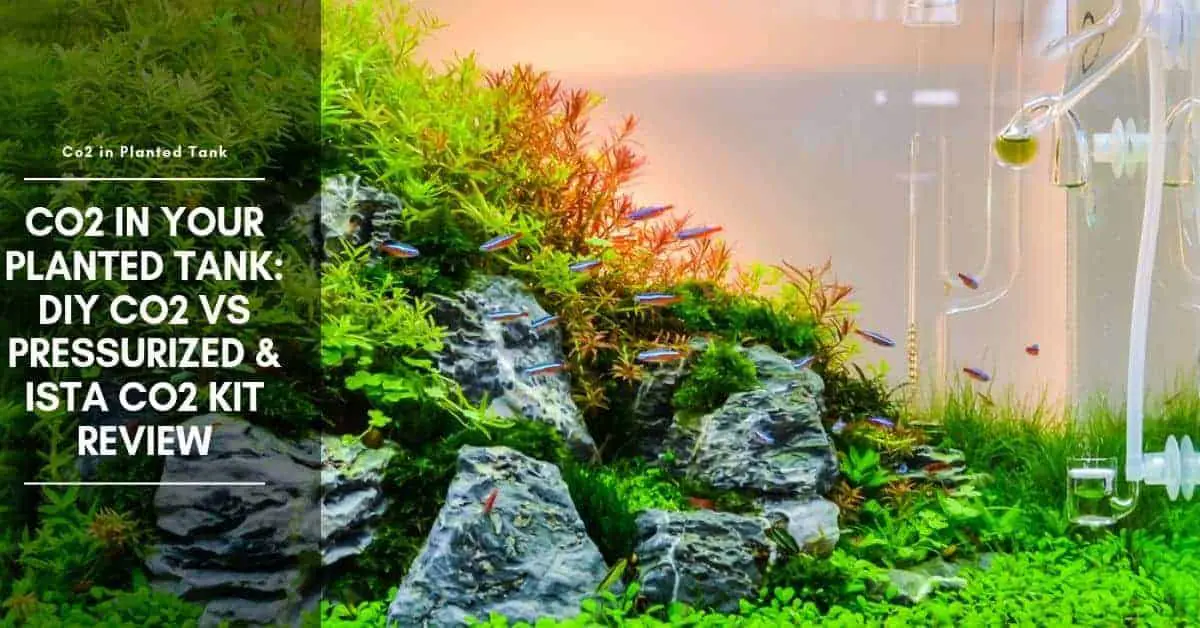
Co2 is a key component of photosynthesis. During the day, plants use energy from the sun along with water and Co2, to create or synthesize sugars that they can use for energy and growth. So without adequate Co2, no matter how much light or nutrients you’re providing your plants, they may not be able to use very much of either of them. This is why aquariums with high light demanding plants, implement injected Co2. There’s a couple of ways to implement Co2 in your tank.
DIY Co2 System
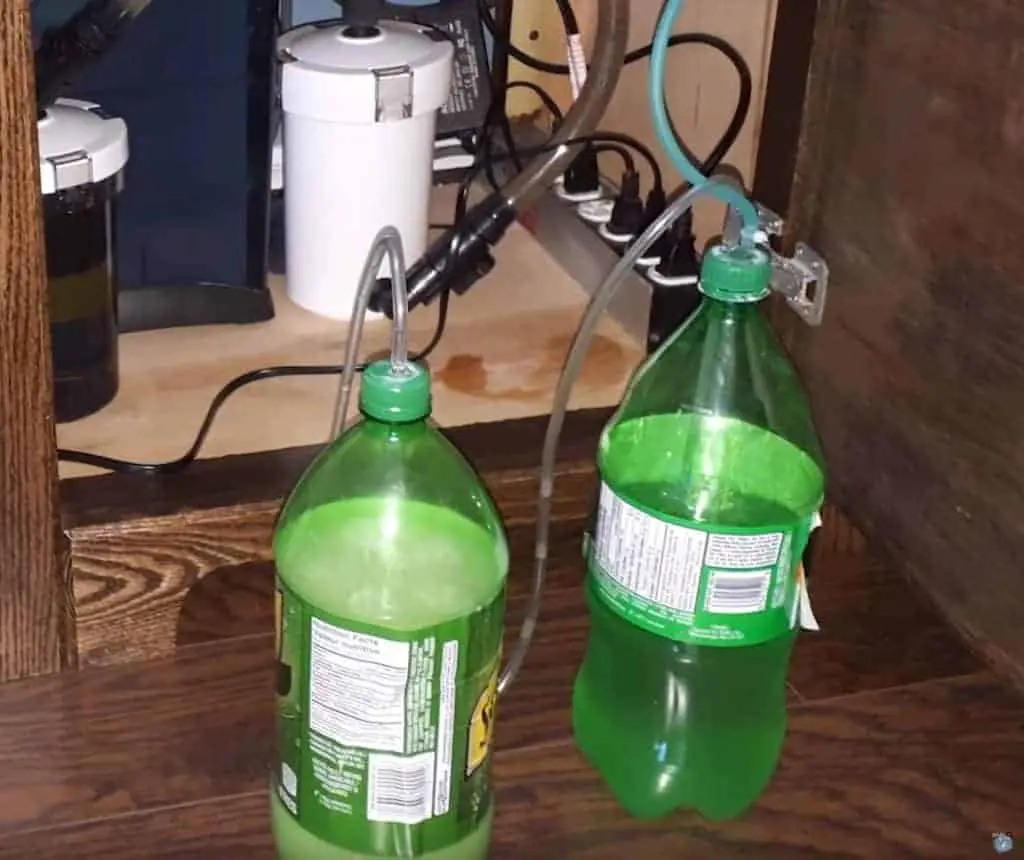
One way is the DIY method, which uses sugar and yeast. You basically stick it in a bottle or on a piece of tubing out of it. It goes into the tank with a diffuser and the yeast consumes the sugar as a food source, produces the Co2 and it goes into the tank.
[amazon table=”6479″]
One of the biggest issues with that method is, it’s not very consistent. The yeast kind of produces Co2 in a big arc, so you get very little at the beginning, then you get a lot and then you get very little closer to the end. It requires a lot of maintenance because that if you want to try to keep it consistent for the plants, and it’s a little bit on the smelly side, it’s not really fun to work with.
So although it can be useful, it’s not the best way to do it, and it can be very frustrating if you’re not getting the results you want.
Pressurized Co2
Your second option is a pressurized Co2 system, which although they come in various setups and forms, basically always have 3 major components:
- Pressurized Co2 bottle (filled with co2 of course).
- Regulator, which allows you to regulate the flow from the bottle to the aquarium.
- Diffuser, which will help give you the best saturation of Co2 into the water.
The bottle can either be disposable or refillable, the regulator could be quite simple with a single gauge, and a valve or more complex with multiple gauges and valves and even include a bubble counter or solenoid, and diffusers can vary being either an in-tank, inline, or even external.
Tetra AquaSafe Plus, 8.45 Ounces, aquarium Water Conditioner And Dechlorinator, Model Number: 46798162681
$8.49 (as of July 14, 2024 11:04 GMT +03:00 - More infoProduct prices and availability are accurate as of the date/time indicated and are subject to change. Any price and availability information displayed on [relevant Amazon Site(s), as applicable] at the time of purchase will apply to the purchase of this product.)API TAP WATER CONDITIONER Aquarium Water Conditioner 16-Ounce Bottle
(as of July 14, 2024 07:00 GMT +03:00 - More infoProduct prices and availability are accurate as of the date/time indicated and are subject to change. Any price and availability information displayed on [relevant Amazon Site(s), as applicable] at the time of purchase will apply to the purchase of this product.)API STRESS COAT Aquarium Water Conditioner 4-Ounce Bottle (85B)
40% Off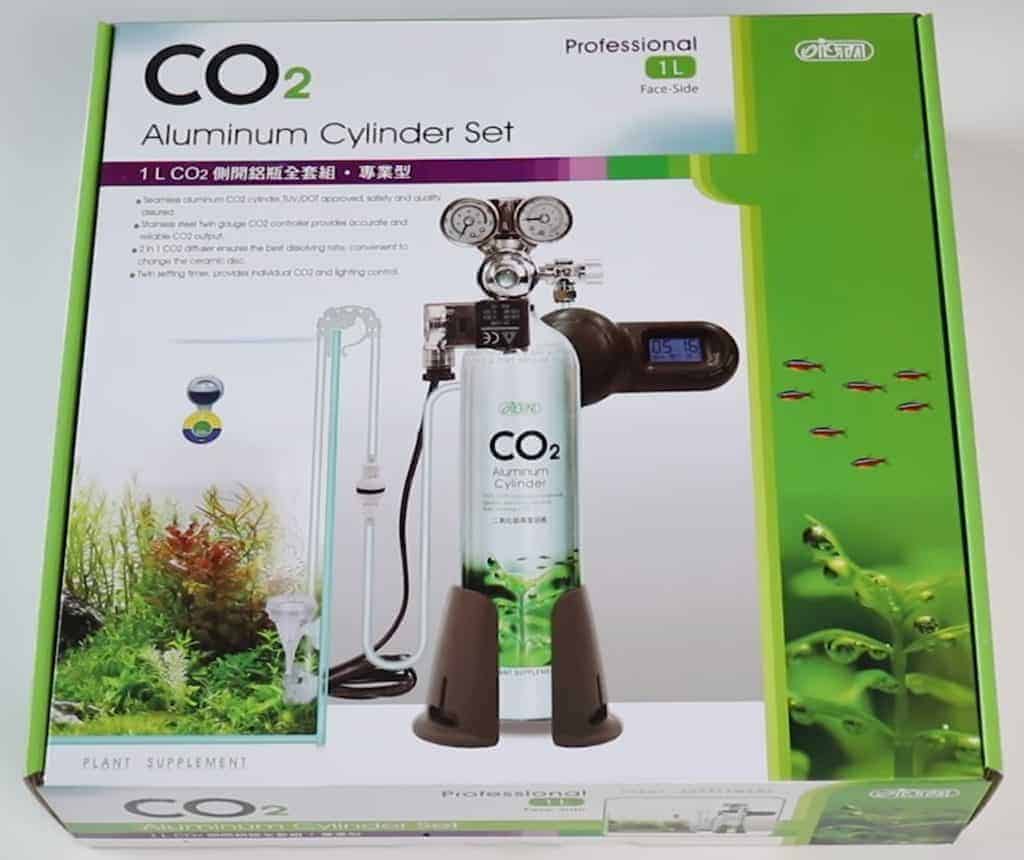
What kind of levels of co2 you’re actually aiming for your plants.
For most plants, you’ll want to maintain the Co2 level in the aquarium, somewhere between 10 – 15 ppm. With higher light demanding plants, being closer to 15 or 25 is going to be better.
How you measure Co2 in your aquarium?
You can measure Co2 in a few different ways:
- Co2 drop checker
- Test kit
- Co2 monitor
- Using PH and KH test kit.
Measure with Co2 drop checker
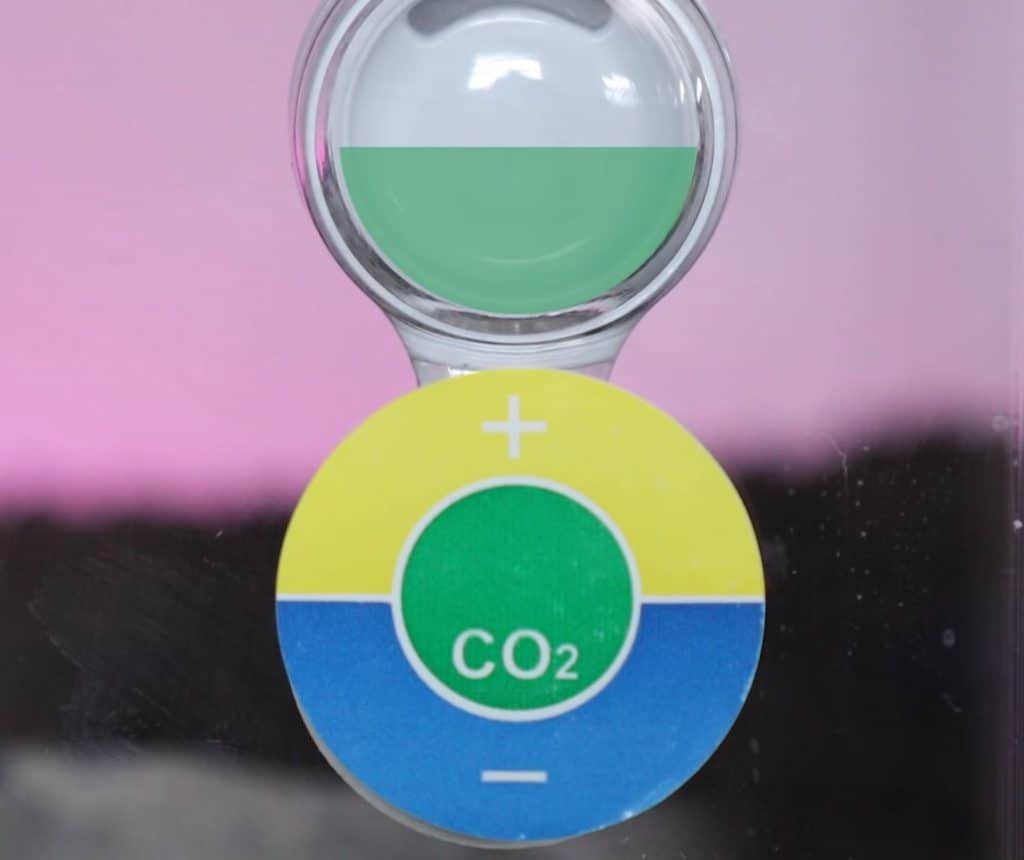
The most common way is a drop checker. It’s a small liquid-filled container, that sits inside of the aquarium, and as the Co2 levels rise and fall, the drop checker liquid will change color from blue when they’re low, green when they’re optimal, and to yellow when there’s too much Co2.
Drop checkers are great because they require little effort to maintain, and they’re giving you a consistent visual readout on the amount of Co2 in the tank.
Measure using a test kit
Test kits are a bit time-consuming and especially when you’re setting up your first Co2 system on the tank. To get it dialed in properly, you should be testing 3 to 5 times in that first day, and it could even take a second day before you’re dialed right in, and then after that, you’re gonna want to test at least once a day just to make sure the tanks on the right track. Because if you get really high Co2, you could really hurt the fish, or if it gets way low then you’re not doing your plants any favors. So it can be a little tough.
But the trade-off is, Co2 test kits can be quite accurate, so if you want to hit a very specific level of Co2 in the tank, that is probably your best bet to get that very precise measurement.
Co2 monitor
Lastly, we’ve got Co2 monitors and other monitors that will essentially allow you to determine the amount of Co2 in the water. They’re great because they tend to be very accurate, they also give you a constant visual readout that’s very easy to read.
The problem is they tend to be quite expensive to purchase, and they also have fairly pricey replacement parts, like probes. And then there’s also calibration solutions that you’re going to need to replace over time as well. You also have to keep them calibrated at least once a month in most cases, so upkeep is minimal, but again can be a little bit pricey. So not for everybody, but if you have it within your budget, they are an essential tool, and you will very much appreciate having one.
Measure Co2 using PH and KH test kit.
A handy trick is to use a pH test and KH test and take those two values to deduce the potential amount of Co2 in the system. There is a handy chart style to determine how much Co2 your system should have used those two readings. So if you don’t have any other form to check your Co2, that’s always the last-ditch effort.
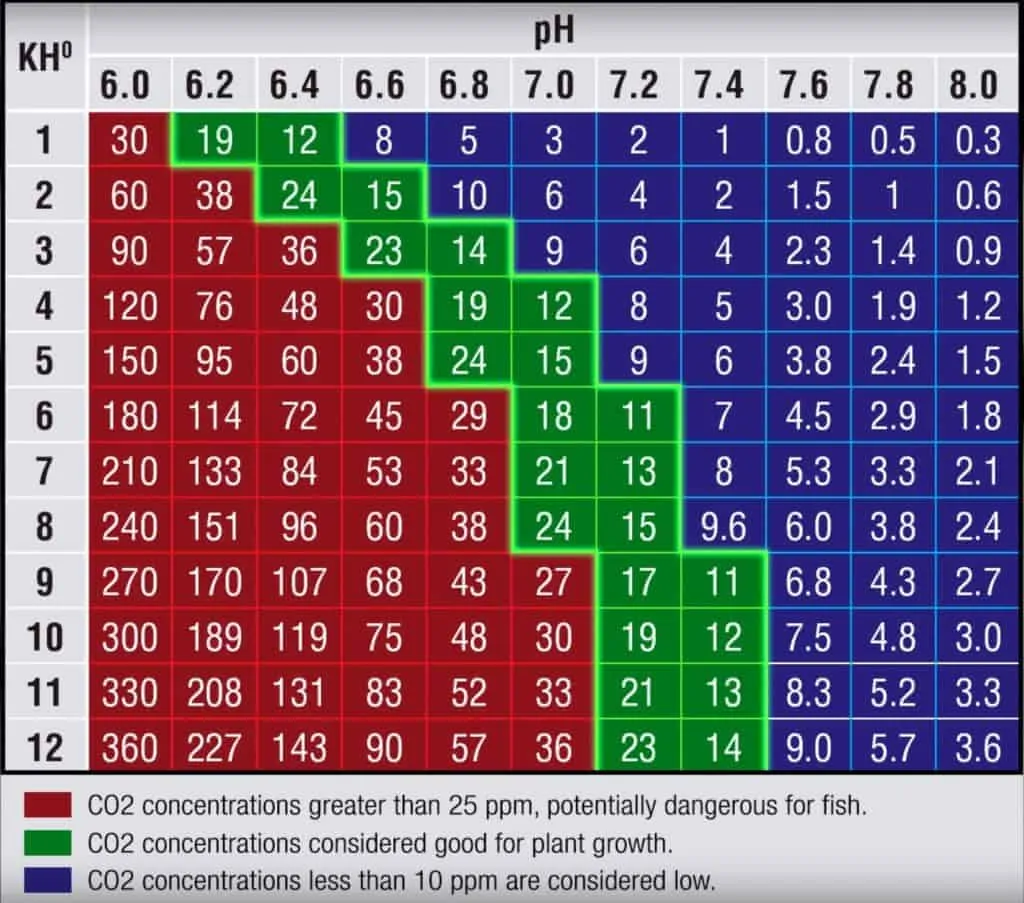
Personally, I really like to use draw checkers. They give me a really good indication of whether or not there’s enough Co2 in the water, versus too much that might hurt the fish. If I ever find that the plants aren’t doing well enough, and lighting seems to be in order, and fertilization seems to be in order, I can always use the Co2 test kit to find out exactly what level my Co2 is that, and try to drill down to a more specific number from there. However, drop checkers enough for most situations. They’re inexpensive, they’re easy to use, and that’s just my personal choice.
ISTA professional Co2 system kit
This system basically got everything you need to set up a Co2 system for your tank, it’s not a massive size – a one-liter bottle, is gonna do a great job on up to about 55 gallons tank, after that, you might want something a little bit bigger.
What we’ve got in the box?
- Co2 cylinder.
- A couple of components that make up the stand for the Co2 bottles, so it doesn’t easily tip over.
- Co2 tubing, which is airline tubing. Usually, it’s a specific grade that doesn’t allow Co2 to bleed through the tubing, or come through it.
- Regulator, this is a face slide regulator, means it’s just gonna stick off of the bottle facing you.
- Gauges, it’s got a needle valve attached to it already, so that’s where you do all your fine-tuning and control.
- Check valve, which is really important to make sure that you get no back siphoning from the tank to your Co2 system – you don’t want any water getting inside of your regulator.
- The regulator also has a solenoid attached to it.
- A timer so you can turn the solenoid on and off.
- Diffuser with a ceramic diffusing disc.
- A couple of clips, to make sure that the tubing very easily goes over the lip of the aquarium without kinking, and down towards the bottle.
- Sticker for your drop checker.
- Drop checker.
- Liquid for the drop checker.
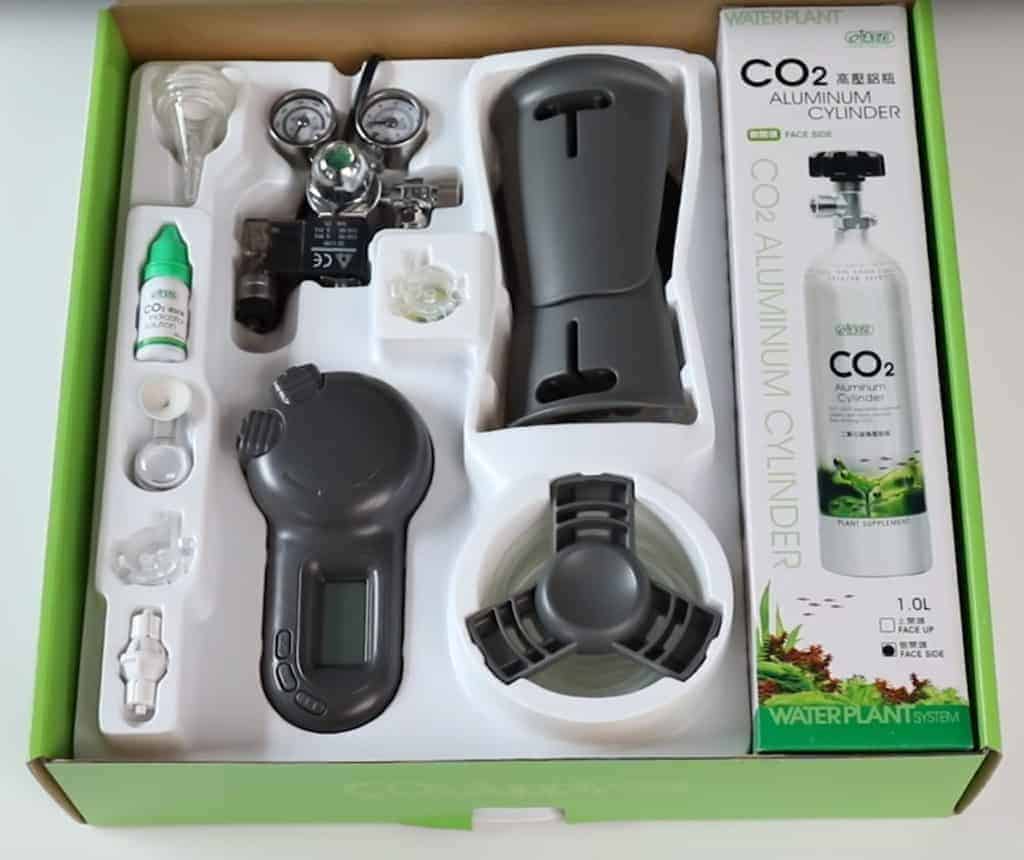
So a couple of reasons I also really like this ISTA system is:
- it’s got a refillable bottle. If you have a local place that you can refill Co2, there are usually pressurized gas companies you can go to. It’s a lot better in terms of waste management, you’re not throwing away little metal bottles. It ends up being more cost-effective over a longer period of time, because those little bottles of Co2, cost more money to make than just one bottle, and going and getting it filled up every time.
- It comes with the solenoid which I mentioned earlier, and a timer to control it. Now one thing you may not know is that plants at night do not uptake Co2 and produce oxygen, they almost respirate in reverse, so you will quickly build-up Co2 in the tank if you do not turn down the regulator manually, or have a timer to turn that solenoid off at night. So that when the lights shut off, and the plants are no longer photosynthesizing, you can just make the Co2 stop happening. that way you’re not wasting Co2 that the plants can’t use and potentially endangering your fish, because Co2 levels could rise to a dangerous level.
In conclusion
All in all, it’s gonna be very easy to implement and regulate this kind of a setup, even for somebody who’s new. It might look complicated but it’s really not.

Hi, my name is Sean, and I’m the primary writer on the site. I’m blogging mostly about freshwater and saltwater aquariums, fish, invertebrates, and plants. I’m experienced in the fishkeeping hobby for many years. Over the years I have kept many tanks, and have recently begun getting more serious in wanting to become a professional aquarist. All my knowledge comes from experience and reading forums and a lot of informative sites. In pursuit of becoming a professional, I also want to inspire as many people as I can to pick up this hobby and keep the public interest growing.
Read more about Sean.
Please join also my Facebook group.

